Advanced Solutions: 3D Printing for Custom Automotive Parts

BLOG

Advanced Solutions: 3D Printing for Custom Automotive Parts

The automotive industry has seen a surge in customization demands as drivers seek personalized solutions for their vehicles. 3D printing for custom automotive parts has revolutionized how performance and aftermarket upgrades are created, offering new possibilities for car enthusiasts, mechanics, and small businesses alike.


What Types of Parts Can You Print?

The limit is your imagination! Print brake rotors or trailer hitches, or custom car parts like air vents and acceleration pedals. Plus, exterior accessories can be rapidly prototyped and adjusted just as easily. You can even print car body parts or specialized fixtures that cater to unique styles.


Custom 3D Printed Car Parts & Prototypes

Prototyping is faster and more cost-effective with 3D printing for custom automotive parts. The ability to quickly iterate designs for automotive applications, whether for exterior accessories or brake rotors, gives designers a competitive edge.


Custom designed, carbon fiber GoPro mount attached to the dashboard of a Solidxperts Nissan 370z racecar.

At Solidxperts, our printers help automotive businesses develop prototypes that precisely meet their specific needs.


Nylon and ABS: Durability Meets Functionality

The combination of nylon and ABS offers a strong, durable option for automotive applications. These materials are excellent for ducts and fixtures that need to withstand high heat or mechanical stress. Prints made from these materials are often indistinguishable from those that are traditionally manufactured, in terms of functionality.


Can You Save on Production Costs?

With 3D printing, a.k.a. additive manufacturing, production costs are significantly reduced. Traditional manufacturing methods require expensive molds and tooling, but FDM and fusion-based processes bypass these, allowing for fast prototyping and production. This benefit is particularly useful for small businesses offering aftermarket upgrades.


How Does 3D Printing Improve Aftermarket Customization?

3D printed car parts are a popular choice for creating custom exterior accessories, from car body pieces to brake rotors. Unlike traditional manufacturing methods, 3D printing offers flexibility and precision for these specific needs.


Enhance Performance with Custom Accessories

Additive manufacturing allows you to create custom car accessories tailored to your vehicle’s exact specifications. From flat surface panels to knobs and interior components, printed accessories ensure that you get the perfect fit and functionality for your aftermarket upgrades.


Why is Nylon a Game-Changer in Automotive 3D Printing?

Materials like nylon and carbon fiber have made a significant impact in automotive applications. These materials offer durable solutions for pieces that require strength, such as trailer hitches or knobs. Nylon is often paired with carbon fiber for even stronger automotive applications, increasing functionality and longevity.


Nylon vs. TPU

Choosing the right material can make all the difference in aftermarket upgrades. Nylon offers high strength, while TPU provides flexibility, ideal for custom pieces like knobs or exterior accessories. The versatility of these materials opens doors for pieces that perfectly match a vehicle’s performance requirements.


Considering 3D Printing for Custom Automotive Parts?

When it comes to 3D printing for custom automotive parts, precision and reliability are paramount. At Solidxperts, we provide FDM printers specifically designed for automotive applications, offering advanced features such as heated chambers and large build volumes. These features are crucial for producing strong, durable components like carbon fiber-reinforced nylon parts that meet the rigorous demands of the automotive industry.

Whether you’re creating prototypes to fine-tune designs or manufacturing final products, Solidxperts’ 3D printing solutions ensure superior quality and functionality. Our printers excel at delivering high-performance parts, from exterior accessories and fixtures to critical performance parts, all while reducing production costs and allowing for rapid iteration.

With Solidxperts’ advanced 3D printing technology, you can produce custom car parts that not only meet but exceed expectations.


Do You Need a Heated Chamber?

A heated chamber is crucial in maintaining consistent material temperatures during the printing process. This feature ensures that car body pieces, especially those requiring a smooth, flat surface, maintain quality throughout production.


Durable, Custom Car Parts from Your Desktop

Solidxperts offers desktop 3D printers capable of producing high-quality custom car pieces right from your workspace. Some of the printers in our lineup are designed to handle advanced materials like carbon fiber and ABS, making them perfect for manufacturing durable fixtures, nozzles, and more.


Performance enhancing Nissan 370z custom designed air intake duct fitting on a Markforged desktop 3D printer.


Precision and Functionality with Markforged

Markforged industry-leading printers are designed to handle a wide range of materials, from carbon fiber and nylon to TPU and ABS, ensuring high strength and durability.

You can produce car parts with reinforced carbon fiber filaments, delivering strength comparable to metal while significantly reducing weight—perfect for automotive applications where both strength and lightness are crucial. Whether you’re working on brake rotors, ducts, or structural performance parts, the precision of Markforged printers ensures accuracy down to the finest details.

Additionally, Markforged’s heated chambers and cloud-based software, Eiger, optimize print performance and streamline the process, lowering production costs and shortening turnaround times.

With these cutting-edge technologies, Solidxperts empowers clients to achieve remarkable results, making additive manufacturing a cost-effective and highly functional solution for any automotive customization project.

Custom-fit carbon fiber air intake duct installed on a Nissan 370z.


Conclusion

3D printing has transformed the way we approach custom automotive parts, offering unmatched flexibility, speed, and precision in manufacturing. Whether you’re a small business looking to reduce production costs or a car enthusiast seeking unique aftermarket upgrades, 3D printing is the key to unlocking endless possibilities. From performance parts to interior accessories and fixtures, the ability to tailor each component to your vehicle’s specific needs is now more accessible than ever.

With nylon, carbon fiber, TPU, and other advanced materials available, you can produce durable, high-quality prints that not only perform well but also last longer. For everything from prototypes to ducts to finishing with flat surfaces, Solidxperts’ range of 3D printers ensures precise and functional results for any automotive application. As the demand for customization grows, now is the perfect time to explore how 3D printing can revolutionize your approach to automotive manufacturing.

X_green_halo

Any questions? Need help? Ask one of our experts.

Whether you’re ready to get started or just have a few more questions, you can contact us toll-free:


    Streamlining Project Management: A Comprehensive Guide to Manage and Control on the 3DEXPERIENCE Platform

    BLOG

    Streamlining Project Management: A Comprehensive Guide to Manage and Control on the 3DEXPERIENCE Platform

    Welcome to our in-depth tutorial on how to effectively leverage Manage and Control, the powerful project management and workflow tool within the 3DEXPERIENCE platform. Designed for teams navigating complex projects, Manage and Control ensures seamless task management, robust workflow automation, and precise access control, all within a unified environment. This guide will walk you through the steps to enhance efficiency, maintain control over your projects, and achieve consistent, high-quality results.


    Table of Contents

    • Introduction to Manage and Control
    • Enabling Manage and Control
    • Setting Up Your Workspace
    • Managing Tasks and Workflows
    • Controlling Access and Permissions
    • Tracking Project Progress
    • Use Cases


    Introduction to Manage and Control

    In today’s fast-paced engineering and design environments, managing projects efficiently is more critical than ever. Projects often involve multiple teams, departments, and stakeholders, each with their unique requirements and timelines. This complexity necessitates a tool that can not only organize and track tasks but also automate processes and ensure that all team members have the information they need, precisely when they need it.

    Manage and Control on the 3DEXPERIENCE platform is the answer to these challenges. It provides a comprehensive set of tools that allow you to manage every aspect of your project, from assigning tasks and controlling access to tracking progress and automating workflows. This integration into a single platform streamlines communication and ensures that everyone involved in the project is aligned, reducing the risk of errors and delays.


    Enabling Manage and Control

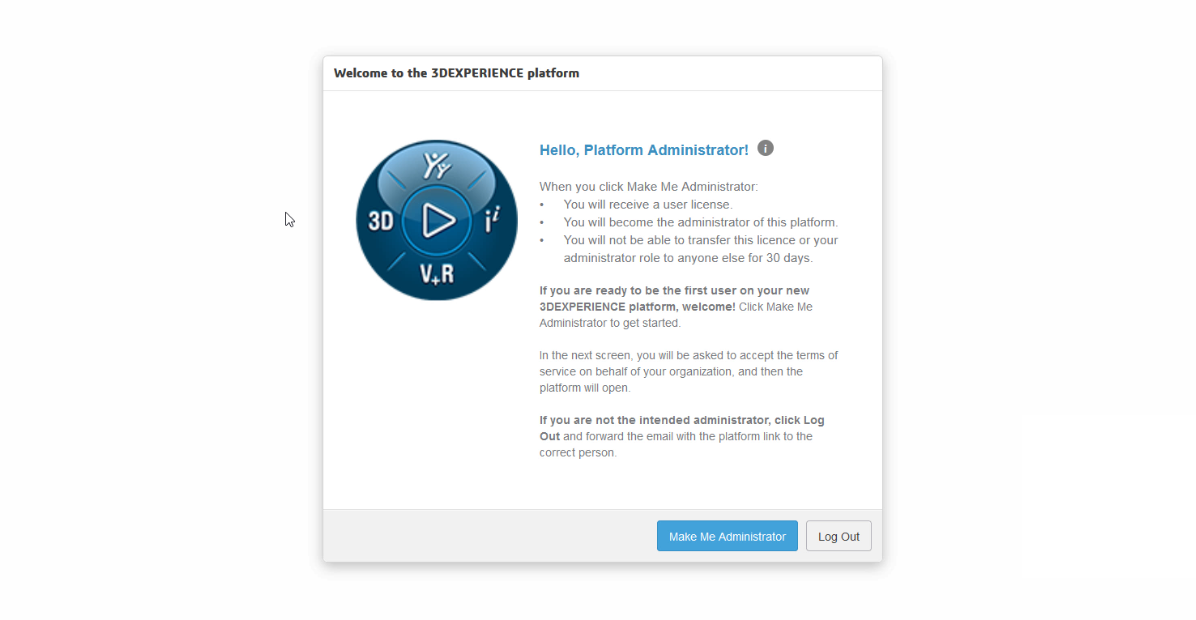
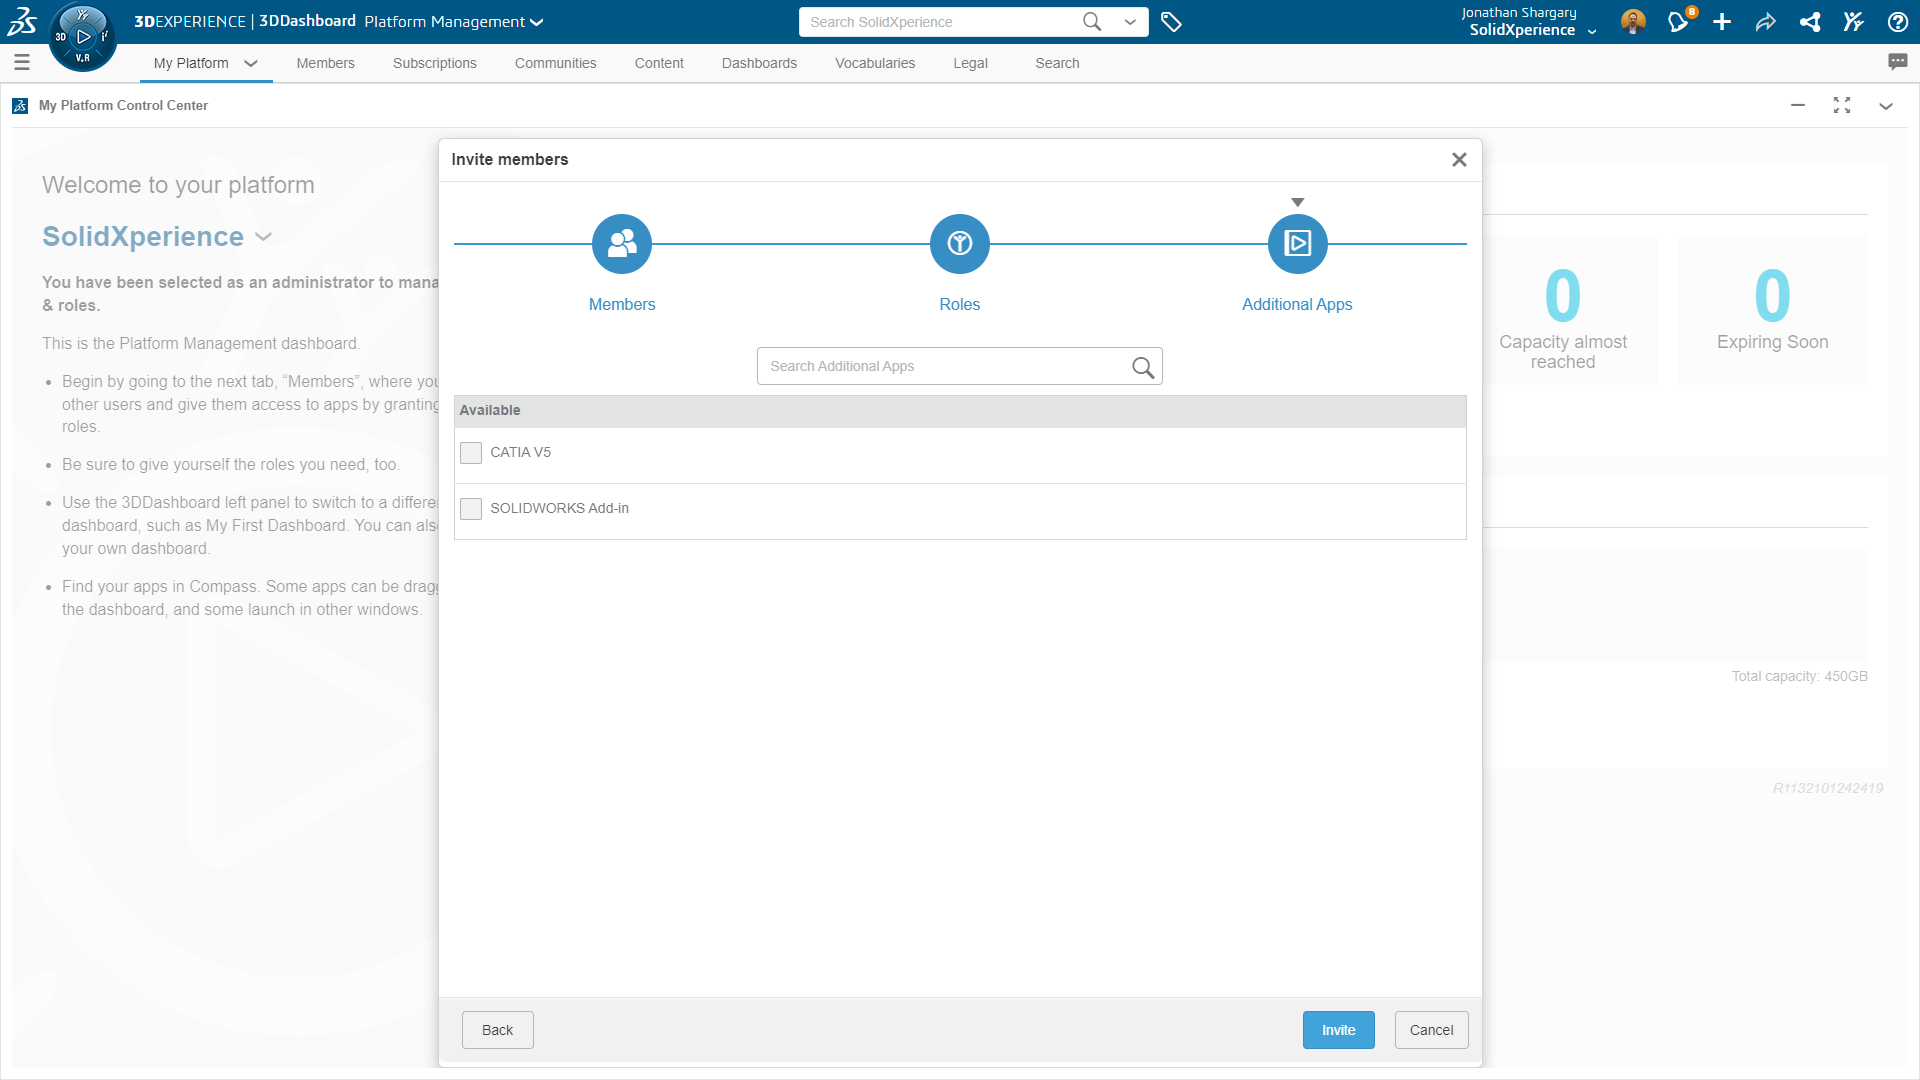
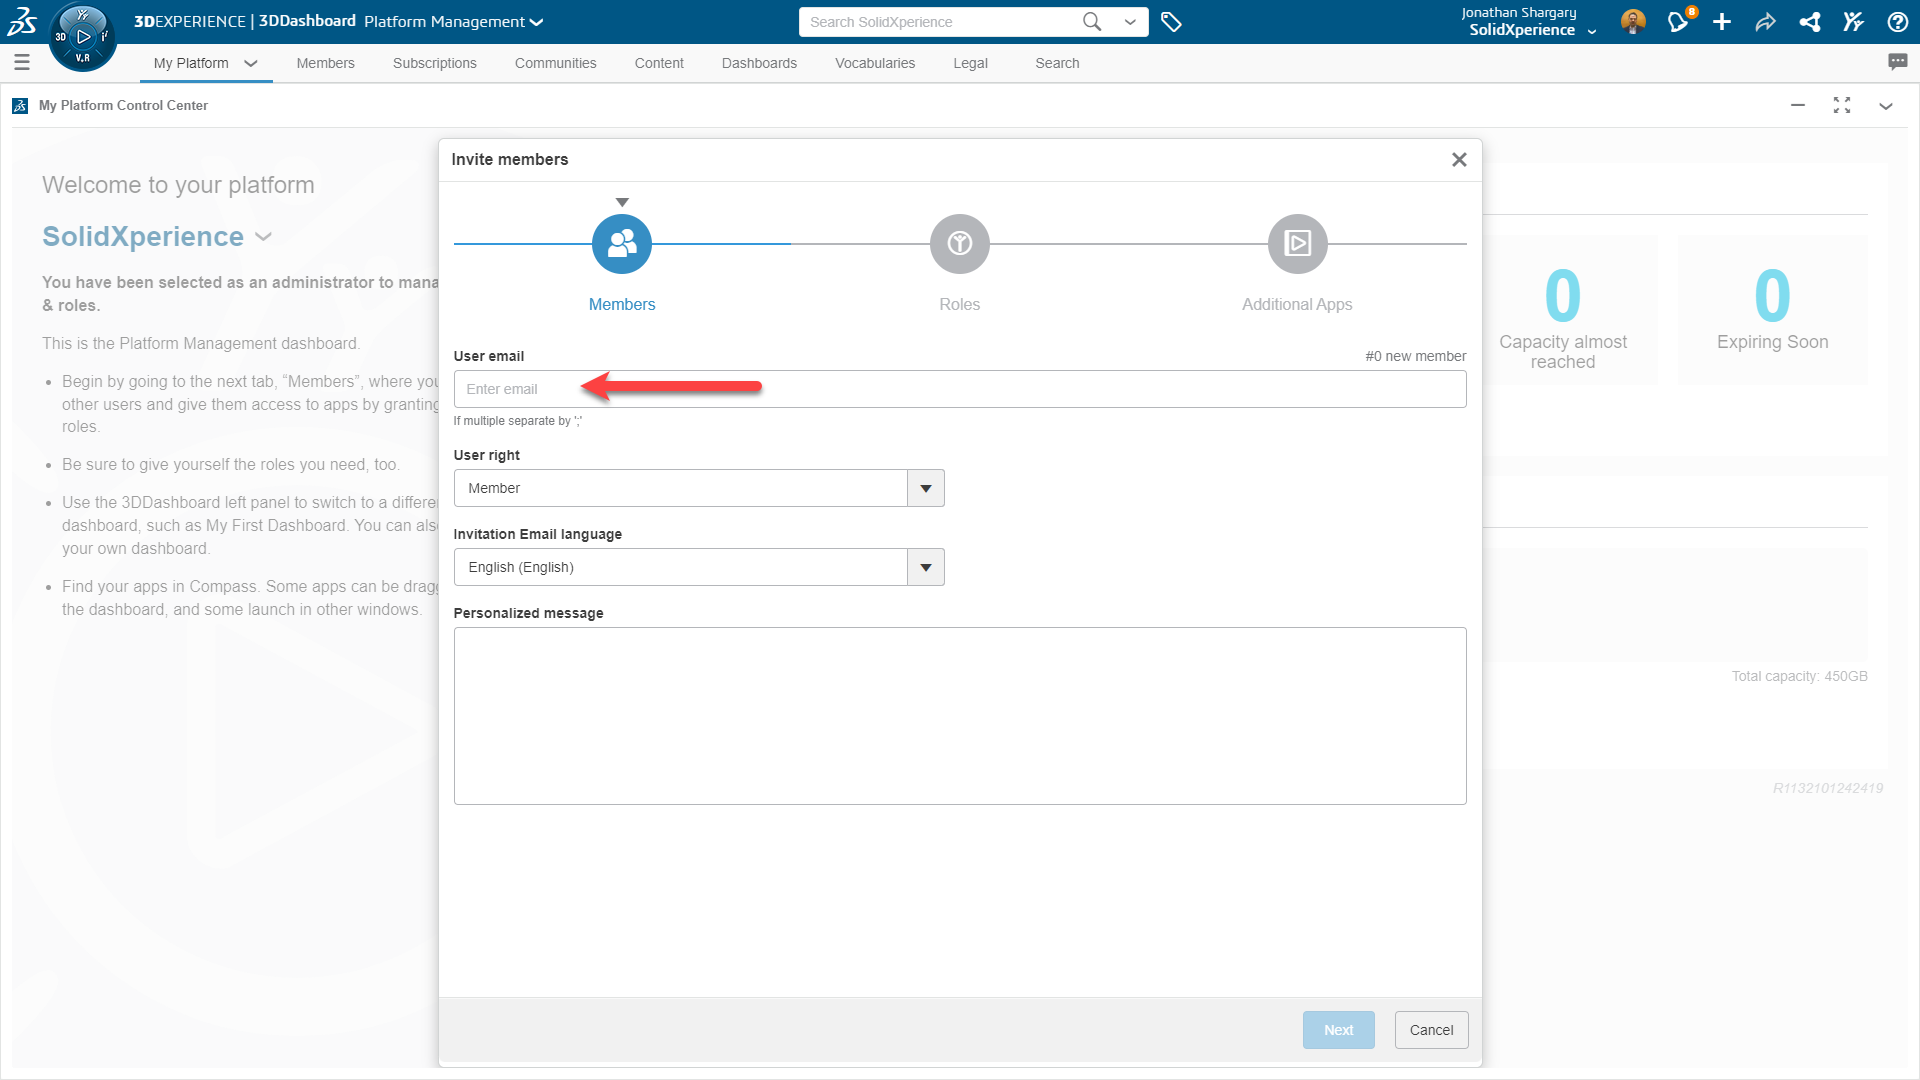
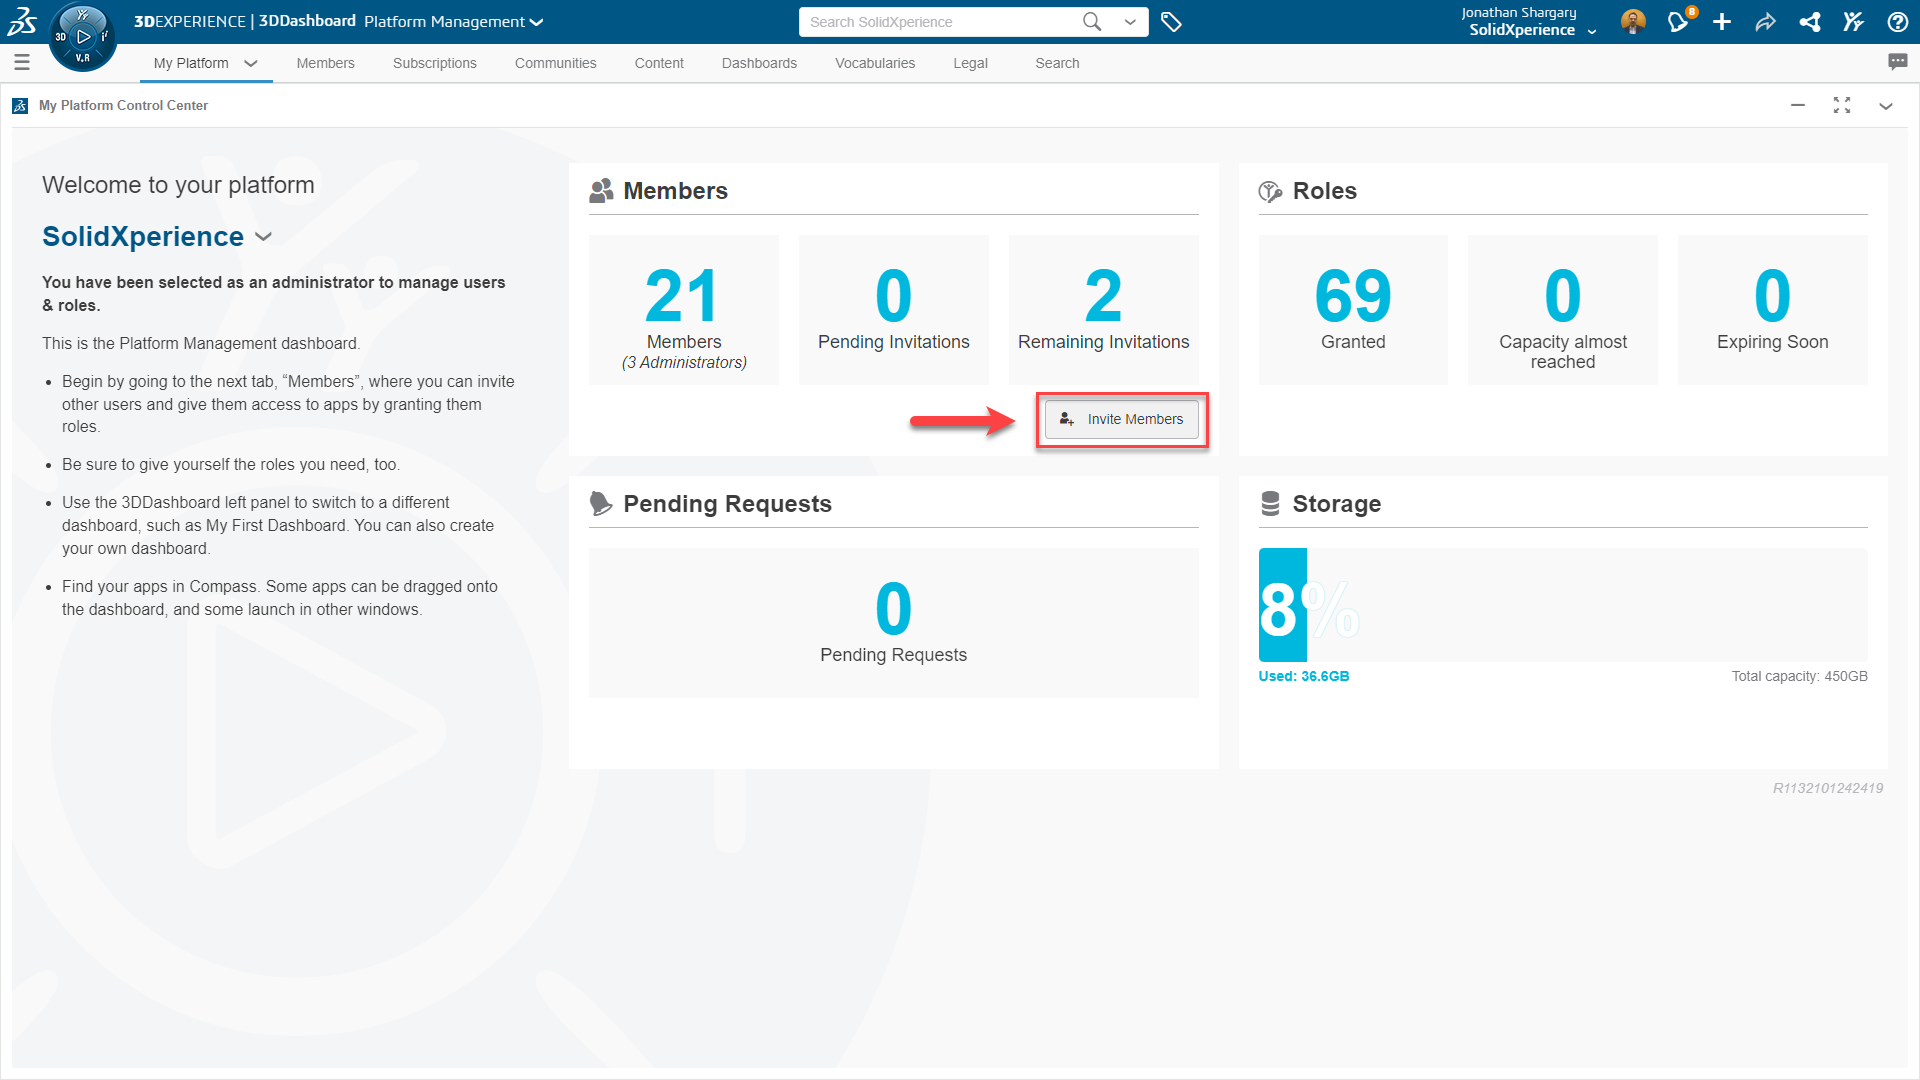
    Before diving into the features of Manage and Control, it’s essential to ensure that your platform is set up correctly. The first step is to verify that your platform administrator has enabled the necessary permissions for managing tasks, workflows, and access controls. These settings are typically configured in the Platform Management dialog, where administrators can set up roles, permissions, and access levels for different users.

    Once the appropriate permissions are in place, your team can fully utilize the Manage and Control features, from creating tasks to automating complex workflows. Ensuring these settings are correctly configured from the outset will save time and prevent potential access issues as your project progresses.


    Setting Up Your Workspace

    The foundation of effective project management lies in a well-organized workspace. On the 3DEXPERIENCE platform, setting up your workspace involves defining your project structure, which includes creating folders, tasks, and subtasks, as well as assigning roles and responsibilities.


    Defining Your Project Structure

    Start by outlining the main goals of your project and breaking them down into manageable components. This often involves creating a hierarchical structure where larger tasks are divided into smaller, more specific subtasks. Each task should have a clear objective and be assigned to a team member responsible for its completion.

    For example, if you’re managing a product development project, you might have high-level tasks such as “Design Phase,” “Prototyping,” and “Testing.” Each of these tasks can be further divided into subtasks like “CAD Modeling,” “Material Selection,” “3D Printing,” and “User Testing.” This breakdown helps ensure that no part of the project is overlooked and that all team members know their specific responsibilities.


    Assigning Roles and Responsibilities

    Once your tasks are defined, assign them to the appropriate team members. The 3DEXPERIENCE platform allows you to assign roles that reflect the actual responsibilities of each team member, such as “Designer,” “Project Manager,” “Engineer,” or “Quality Assurance.” Assigning these roles helps to clarify expectations and ensures that each team member knows who to contact for specific issues or approvals.

    In addition to individual task assignments, consider setting up teams or groups for larger projects. This grouping allows for more efficient management of tasks and communication, as team members can easily collaborate within their assigned group while still having visibility into the broader project.


    Managing Tasks and Workflows

    With your workspace set up, you can begin managing tasks and automating workflows. Effective task management and workflow automation are at the heart of the Manage and Control feature, allowing you to keep your project on track and ensure that all tasks are completed in a timely manner.


    Task Management

    Task management on the 3DEXPERIENCE platform is straightforward yet powerful. After creating tasks and subtasks, you can assign due dates, set priorities, and add detailed descriptions or attachments. The platform also allows you to link tasks together, creating dependencies that ensure tasks are completed in the correct order. For example, the “User Testing” task cannot begin until the “Prototyping” task is complete. This logical linking of tasks helps prevent bottlenecks and ensures that your project progresses smoothly.

    As tasks are completed, team members can update their status, allowing project managers to track progress in real-time. The platform’s intuitive interface makes it easy to see which tasks are on schedule, which are delayed, and which have been completed, providing you with a clear overview of your project at all times.


    Workflow Automation

    Workflow automation is one of the most powerful features of Manage and Control. By setting up automated workflows, you can streamline repetitive tasks, ensure that approvals are obtained promptly, and reduce the risk of human error.

    For example, you can create a workflow that automatically routes a completed CAD model to the quality assurance team for review, and then to the project manager for final approval. If any issues are found during the quality assurance review, the workflow can automatically send the model back to the designer with detailed feedback, ensuring that revisions are made before the project can move forward.

    These automated workflows can be customized to fit the unique needs of your project, whether it’s a simple approval process or a complex series of interdependent tasks. By automating these processes, you free up your team to focus on more critical tasks, improving overall efficiency and reducing the time it takes to complete your project.


    Controlling Access and Permissions

    In any project, controlling access to information is crucial. The 3DEXPERIENCE platform provides robust access control features that allow you to manage who can view, edit, or approve documents and tasks.


    Defining Access Levels

    Access control on the 3DEXPERIENCE platform is highly customizable. You can define access levels for individual users or groups, specifying who can view, edit, or approve each task or document. For example, you might allow designers to edit CAD models but restrict them from approving final designs, a role reserved for the project manager.

    These access controls help ensure that only authorized team members can make changes to critical documents, reducing the risk of unauthorized edits or accidental deletions. It also simplifies the approval process, as only those with the appropriate permissions can approve or reject tasks.


    Regularly Reviewing Permissions

    As your project evolves, so too might the roles and responsibilities of your team members. It’s essential to regularly review and update access permissions to reflect any changes in team structure or project scope. This ongoing review ensures that access to critical information is always limited to those who need it, helping to maintain the security and integrity of your project.


    Tracking Project Progress

    One of the key benefits of using Manage and Control is the ability to track your project’s progress in real-time. The 3DEXPERIENCE platform provides several tools that allow you to monitor task completion, identify potential bottlenecks, and ensure that your project stays on schedule.


    Visualizing Progress

    The platform offers multiple ways to visualize your project’s progress, including Gantt charts, Kanban boards, and project dashboards. These tools provide an at-a-glance view of where your project stands, highlighting completed tasks, tasks in progress, and any that are overdue.

    Gantt charts are particularly useful for complex projects, as they allow you to see the dependencies between tasks and how delays in one area might impact the overall project timeline. Kanban boards, on the other hand, provide a more straightforward, task-based view, making it easy to see what tasks are currently being worked on and what’s up next.


    Generating Reports

    In addition to visual tools, the 3DEXPERIENCE platform allows you to generate detailed reports on various aspects of your project. These reports can include information on task completion rates, project milestones, resource allocation, and more. Regularly reviewing these reports can help you identify trends, spot potential issues before they become problems, and make informed decisions about how to proceed with your project.


    Use Cases

    Manage and Control on the 3DEXPERIENCE platform is versatile enough to be used in various industries and project types. Here are a few examples of how different teams can benefit from this powerful tool:


    • Complex Project Management: For large, multi-team projects, Manage and Control ensures that all tasks are clearly defined, assigned, and tracked. This capability is particularly valuable in industries like aerospace, automotive, and industrial design, where projects often involve numerous stakeholders and tight deadlines.


    • Compliance Management: In regulated industries such as pharmaceuticals or construction, managing compliance-related tasks is critical. Manage and Control allows you to set up workflows that ensure all necessary steps are completed, documented, and approved, helping you stay compliant with industry regulations.


    • Collaboration Across Teams: Whether your teams are located in different offices or working remotely, Manage and Control facilitates seamless collaboration. All team members can access the same tasks, updates, and documents, ensuring that everyone stays on the same page, regardless of their location.


    Conclusion

    Manage and Control is an indispensable tool for any team looking to streamline project management, automate workflows, and maintain control over their projects. By using this powerful feature within the 3DEXPERIENCE platform, you can ensure that your projects are completed on time, within budget, and to the highest quality standards.

    If you have any questions or need assistance getting started with Manage and Control, don’t hesitate to reach out to us. Our Xperts are here to help you make the most of this powerful tool for your project management needs.


    Discover more about Manage & Control on the 3DEXPERIENCE!


    Compete your 3DEXPERIENCE knowledge. Read through our blogs on Share and Markup, and Store and Revise.

    X_green_halo

    Any questions? Need help? Ask one of our experts.

    Whether you’re ready to get started or just have a few more questions, you can contact us toll-free:
      Mastering Version Control: A Guide to Store and Revise on the 3DEXPERIENCE Platform

      BLOG

      Mastering Version Control: A Guide to Store and Revise on the 3DEXPERIENCE Platform

      Welcome to our tutorial on getting started with Store and Revise, the robust version control and file management tool on the 3DEXPERIENCE platform. Store and Revise is essential for maintaining the integrity of your design data, ensuring that you can easily manage different versions of your files while collaborating across teams. Whether you’re storing new revisions or need to revert to an earlier version of your design, this tutorial will guide you through the process step by step, ensuring your projects remain organized and up to date.


      Table of Contents

      • Introduction to Store and Revise
      • Enabling Store and Revise
      • Storing Your Design Files
      • Revising Your Designs
      • Managing Revisions
      • Accessing Previous Versions
      • Use Cases


      Introduction to Store and Revise

      Store and Revise is a powerful feature within the 3DEXPERIENCE platform that simplifies version control for your designs. It allows you to securely store and manage multiple versions of your files directly within the platform, making it easier to track changes, collaborate with team members, and maintain a clear history of your projects.


      Enabling Store and Revise

      Before you can begin using Store and Revise, ensure that your platform administrator has enabled the appropriate settings for version control and file storage within the Platform Management options. This step is crucial for ensuring that you have the necessary permissions to store and manage design revisions.


      Storing Your Design Files

      • Click on the “Save with Options” command in SOLIDWORKS or your preferred design software.
      • Choose the appropriate storage location within the 3DEXPERIENCE platform (e.g., Collaborative Space or Bookmark Root).
      • Configure options such as “Create New Revision” or “Overwrite Existing” to manage how your files are stored.
      • Add any relevant metadata or tags to help categorize and identify your files later.


      Revising Your Designs

      When working on a design that requires changes, you can easily revise the file:


      • Open the design file you wish to revise.
      • Make the necessary changes and click on “Save with Options” to create a new revision.
      • Select “Create New Revision” to ensure that your changes are stored as a separate version, preserving the previous iteration of your design.


      Managing Revisions

      The 3DEXPERIENCE platform provides a comprehensive interface to manage your file revisions:


      • Navigate to the “Revisions” tab in your design file’s properties to view a list of all saved versions.
      • Use the “Promote” or “Demote” options to manage the lifecycle of your design, such as moving a design from “In Work” to “Released” status.
      • You can also set specific versions as “Preferred” to highlight the most relevant or up-to-date design for your team.


      Accessing Previous Versions

      One of the key benefits of Store and Revise is the ability to access previous versions of your designs:


      • From the “Revisions” tab, select any earlier version of your design.
      • Click on “Open” to view or revert to that version if necessary.
      • This feature is particularly useful when you need to compare changes or roll back to an earlier design.


      Use Cases

      • Design Iteration: Easily manage and track multiple design iterations, ensuring that your team always has access to the most current version.
      • Collaboration Across Teams: Collaborate with team members across different departments, knowing that all changes are tracked and documented.
      • Product Lifecycle Management: Manage the entire lifecycle of your design files, from concept to release, within a single platform.


      Store and Revise is a vital tool for maintaining control over your design data, ensuring that every version of your project is securely stored and easily accessible. It simplifies the process of version management, allowing you to focus on innovation and product development without worrying about losing track of your files.

      If you have any questions or need further assistance, don’t hesitate to reach out to us. Our Xperts are here to help you get the most out of Store and Revise for your design and collaboration needs.

      Need to know more? Check out our previous blog to learn more about Share and Markup on the 3DEXPERIENCE platform!

      X_green_halo

      Any questions? Need help? Ask one of our experts.

      Whether you’re ready to get started or just have a few more questions, you can contact us toll-free:

        Physical Products or Representations? A Guide to Smart PDM Practices on the 3DEXPERIENCE

        BLOG

        Physical Products or Representations? A Guide to Smart PDM Practices on the 3DEXPERIENCE

        Let’s talk about a decision we, as CAD users, often face: When do I save a design as a physical product versus a representation in our 3DEXPERIENCE platform?

        It’s a common scenario, and getting it right can really streamline your workflow.


        Managing Your Data with 3DEXPERIENCE Integration

        First off, if you want more control over what gets saved, check out the “3DEXPERIENCE Compatibility” option under System Options. By using the Configuration Manager in SOLIDWORKS, you can decide whether to save your configurations as a physical product or just as a representation.

        So, what’s the difference?


        • Physical products are usually what we use to represent the actual manufactured design, complete with an item (part) number on the platform.
        • On the other hand, Representations are more for our internal design process—they stay linked to the physical product but don’t get their own item number.

        Think of a representation as a way to show, for example, an exploded view of a product without creating a whole new part number.


        Prototypes and Production Parts & Assemblies

        When it comes to prototypes or production parts and assemblies, it’s generally a good idea to stick to one physical product per part or assembly file. This way, each physical product on the platform represents a single manufactured item, capturing everything from lifecycle details to the enterprise item number.

        Of course, there will be times when you need additional configurations to help with your design in SOLIDWORKS. In these cases, it’s smarter to save them as Representations, so you’re not cluttering up the system with extra Physical Products that aren’t really necessary.

        To make this process smoother, be sure to enable the “Update SOLIDWORKS files for compatibility with the 3DEXPERIENCE platform” option for everyone. Also, if you go into System Options under 3DEXPERIENCE Integration and select “Allow a single physical product in new parts and assemblies,” you’ll find your workflow gets a lot simpler—and faster—because there’s less PLM data flying back and forth.

        You can certainly choose to allow multiple physical products on new parts and assemblies, no problem! But make sure everyone is on board. Choose one way of working for everyone on your platform, without switching back and forth, to keep everything simple and clean.


        Systems Options - 3DEXPERIENCE Integration menu screenshot


        Convert to Physical Property CAD Family Configurations menu screenshot


        Purchased and Library Parts

        Now, for parts and assemblies we buy externally, the rules are a bit different. These usually sit in a library and aren’t something we revise or modify. So, treat these with the same care, but understand they have their own set of guidelines.


        Managing Configurations in Part Files

        If you’ve got a part file with up to 20 configurations, you’re good to go with Physical Product configurations without worrying about performance. But if you’re dealing with more than 20 configurations, it’s better to stick to one Physical Product configuration per file. Each configuration should get its own part file to keep things running smoothly.


        Assembly Files and Configurations

        The same rule applies to assembly files: one Physical Product configuration per file is the way to go for top performance. Again, save each configuration in a separate assembly file.


        Let’s Look at Some Common Scenarios

        Of course, every project is unique, so let’s dive into a few specific scenarios.


        Cast & Machined Variations

        When you’re managing cast and machined variations of a part, SOLIDWORKS configurations make it easy to capture these differences. The approach you take depends on whether you need to treat these variations as a single part number or manage them separately.

        If both the cast and machined versions share a part number, keep them in the same file with one Physical Product configuration. Save the cast and intermediate machined states as Representations. If they need separate part numbers and lifecycle management, create individual part files and physical products for each.


        Mirrored Parts

        For mirrored parts—think left-hand and right-hand versions with unique part numbers—create separate files, each with its own Physical Product configuration. If both versions are part of the same product, go ahead and put them in a single file with two lifecycle-coupled Physical Product configurations.


        Sheet Metal Parts – Flat and Folded States

        For sheet metal parts where the flat and folded versions share a part number, use one Physical Product configuration for the folded state and a Representation for the flat pattern. If each variation needs its own revision management and lifecycle, create separate part files for each, with one Physical Product configuration and a Representation configuration for the flat state.


        Weldment Parts

        For weldments, if the “As Machined” configuration represents the final product, use that as the Physical Product configuration and save the “As Welded” configuration as a Representation. If both need to be managed separately, convert the “As Welded” configuration to a Physical Product configuration so both are represented individually on the 3DEXPERIENCE platform.


        Best Practices to Keep in Mind

        • Use the Configuration Manager from the get-go.
        • Upgrade any existing files before going live.
        • Stick to one Physical Product configuration per file to keep things simple and efficient.
        • Only create multi-product files if all the products share a lifecycle.


        By following these guidelines, you’ll find your work on the 3DEXPERIENCE platform to be smoother, more organized, and just plain easier. Happy designing!

        Reach out to our dedicated 3DEXPERIENCE specialists for more info about best practices, the latest available training courses, or, if you’re new here, how to start your 3DEXPERIENCE journey!

        X_green_halo

        Any questions? Need help? Ask one of our experts.

        Whether you’re ready to get started or just have a few more questions, you can contact us toll-free:
          Unlocking 3D Creativity: Designing Complex Shapes Made Easy

          BLOG

          Unlocking 3D Creativity: Designing Complex Shapes Made Easy

          Introduction

          When it comes to the creative process, the 3D Sculptor and 3D Creator roles on the 3DEXPERIENCE platform provide a user-friendly interface that allows you to easily manipulate and shape complex parts. These tools offer a streamlined workflow and powerful CAD capabilities, making the design process more efficient and intuitive. With x3D Sculptor and 3D Creator at your fingertips, the art of crafting intricate shapes becomes a seamless journey.


          3D Sculptor, 3D Creator, and the 3DEXPERIENCE Platform

          The 3DEXPERIENCE platform roles 3D Sculptor and 3D Creator revolutionize the way designers and engineers approach complex shape design. By harnessing the power of these browser-based functionalities, you can break down intricate concepts into manageable steps, starting with basic shapes and gradually evolving them into sophisticated designs. This streamlined workflow not only enhances design flexibility but also enables quick iteration and realization of creative ideas. With advanced features tailored for various industries, 3D Sculptor and 3D Creator are paving the way for unlocking limitless creativity.


          3D Sculptor Enhances Design FlexibilityA person seated in front of two computer monitors displaying 3D Sculptor and a 3D model

          The 3D Sculptor role simplifies the creation of complex parts by starting from basic shapes and using advanced tools for intricate designs. It allows easy manipulation of compound shapes and complex geometries, ensuring your creative vision is realized. Additionally, access to a variety of Sub-D tools within the xShape app enhances your ability to refine and perfect designs with precision and flexibility. These capabilities empower you to push the boundaries of design, achieving higher levels of complexity and detail.


          • Create complex parts using basic shapes
          • Use advanced features for working with compound shapes
          • Easily manipulate and shape complex geometries
          • Access additional Sub-D tools in the xShape app


          Explore the free xShape Master Class to hone your skills!


          A person holding a tablet displaying 3D Creator and a colorful 3D model of a mechanical part3D Creator Streamlines Your Design Workflow

          With 3D Creator, on the other hand, the focus is on streamlining the design process. This tool provides traditional parametric modeling tools in its xDesign app, allowing you to easily create and modify designs using curves and surfaces. The combination of Sub-D modeling in 3D Sculptor and parametric modeling in 3D Creator gives you the flexibility to mix and match tools as needed, ensuring that you have the right tools for the job.


          • Provides traditional parametric modeling
          • Allows for easy creation and modification of designs using curves and surfaces
          • Offers a seamless workflow with 3D Sculptor


          3D Sculptor and 3D Creator for Complex Shapes

          The advantages of using 3D Sculptor and 3D Creator for complex shapes are numerous. These tools not only enhance design flexibility but also streamline the design process, saving you time and effort. With their intuitive interfaces and powerful capabilities, you can easily create and modify complex geometries, whether you’re starting from basic shapes or working with compound parts. Additionally, these tools facilitate collaboration in design projects, allowing team members to work together seamlessly and share their ideas.


          Simplifying the Creation of Complex Geometries

          Creating complex geometries can be a challenging task, but with 3D Sculptor and 3D Creator, it becomes much simpler. These tools provide a range of features and tools specifically designed to simplify the creation of complex shapes, including the use of simple shapes as building blocks. Whether you’re working with compound shapes or intricate parts, you’ll find that these tools offer the flexibility and precision needed to bring your designs to life. By starting with basic shapes and gradually building up the complexity, you can create unique and innovative designs without the limitations of traditional tools.


          Enhancing Collaboration in Design Projects

          Collaboration is a vital aspect of any design project, and 3D Sculptor and 3D Creator make it easier than ever to work together seamlessly. With these tools, team members can collaborate in real-time, sharing their ideas and making modifications on the fly. This not only speeds up the creative process but also ensures that everyone’s input is taken into account. Whether you’re working on a design project with colleagues or collaborating with clients, 3D Sculptor and 3D Creator provide the necessary tools to enhance collaboration and bring your designs to life.


          Step-by-Step Guide to Designing with 3D Sculptor

          Designing with 3D Sculptor is a straightforward process that allows you to unleash your creativity and create complex shapes with ease. Here is a step-by-step guide to help you get started:


          1. Start by launching the 3D Sculptor app in your browser.
          2. Choose a basic shape to serve as the foundation for your design.
          3. Use the push and pull technique to manipulate the shape and create the desired complex geometry.
          4. Access additional Sub-D tools in the xShape app to refine and fine-tune your design.
          5. Save your design and export it for further use or collaboration.


          Starting Your First Project: Tips and Tricks

          To set yourself up for success, start by selecting a basic shape that closely resembles your final design. This simplifies the process and provides a solid base upon which to build. From here, you can push and pull your base to manipulate the shape, adding layers of complexity and detail.

          As you progress, don’t hesitate to experiment with different Sub-D tools. These tools are invaluable for refining and perfecting your design, allowing you to achieve the intricate details that will make your project stand out.


          • Begin with a clear idea of the complex shape you want to create
          • Start with a basic shape that closely resembles the final design
          • Utilize the push and pull technique to manipulate the shape and add complexity
          • Experiment with different Sub-D tools to refine and perfect your design


          Advanced Techniques for Refining Your Designs

          Once you’ve mastered the basics, it’s time to elevate your designs with advanced techniques. Combining parametric modeling techniques with Sub-D modeling can offer added flexibility and control. Experiment with different surface finishes and textures and discover unique effects that add depth and character to your creations. This hybrid approach allows you to fine-tune your designs with mathematical precision while retaining the creative freedom of Sub-D modeling.


          • Use advanced Sub-D tools to add intricate details to your design
          • Combine parametric modeling techniques with Sub-D modeling for added flexibility
          • Experiment with different surface finishes and textures to enhance the visual appeal of your design
          • Take advantage of the collaboration features to gather feedback and make adjustments

          Frequently Asked Questions

          What is a Role on the 3DEXPERIENCE platform?

          A Role on the 3DEXPERIENCE platform refers to a set of permissions and capabilities assigned to a user, determining what actions they can perform within the software. Each role is tailored to specific functions or responsibilities, ensuring that users have access only to the tools and features necessary for their tasks. By assigning roles appropriately, organizations can optimize workflow efficiency and data security within the platform.

          What are some techniques for designing complex shapes in 3D modeling?

          Designing complex shapes requires a combination of creativity and technical skills. Some techniques include starting with basic shapes and gradually building up complexity, using Sub-D modeling tools for organic shapes, and leveraging parametric modeling for precise control over dimensions and features.

          How do you ensure manufacturability when designing complex shapes?

          When designing complex shapes, it is important to consider manufacturability. By utilizing tools like Manufacturing Definition Creator, you can create 3D and 2D definitions that ensure your design can be manufactured correctly. This helps eliminate potential issues and ensures a smooth transition from design to production.

          What software tools are commonly used for designing complex shapes?

          There are several software tools commonly used for designing complex shapes, with 3D Sculptor and 3D Creator being popular choices. These browser-based tools offer powerful CAD capabilities and streamlined workflows, making them ideal for tackling the challenges of complex designs and organic shapes.

          What are the challenges faced when designing intricate geometries?

          Designing intricate geometries can present several challenges. These include maintaining the integrity of the design while adding complexity, ensuring the manufacturability of the final product, and managing the interdependencies between various features and dimensions. However, with the right tools and techniques, these challenges can be overcome.

          What role does parametric design play in creating complex shapes?

          Parametric design allows designers to manipulate basic shapes and explore different possibilities in creating complex shapes. It provides the flexibility to modify dimensions, curves, and surfaces, making it easier to iterate and refine designs. The parametric approach streamlines the creative process and enables designers to achieve complex shapes efficiently.

          X_green_halo

          Any questions? Need help? Ask one of our experts.

          Whether you’re ready to get started or just have a few more questions, you can contact us toll-free:
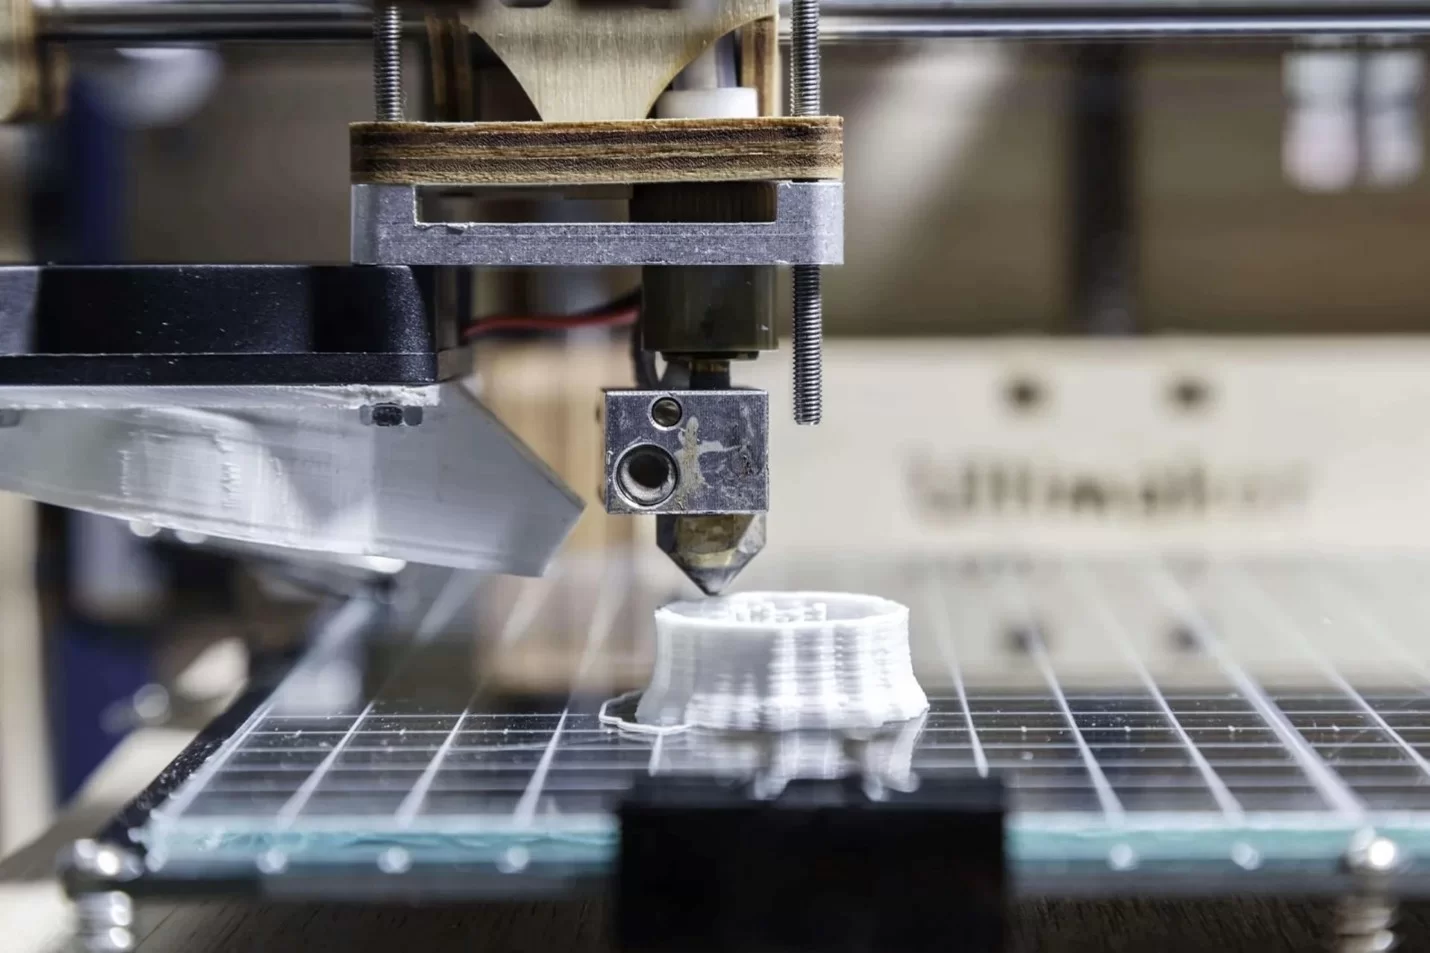
            Refreshed, Renewed, & Reinvigorated: The New Solidxperts Debuts at MMTS 2024

            BLOG

            Refreshed, Renewed, & Reinvigorated: The New Solidxperts Debuts at MMTS 2024

            The Montreal Manufacturing Technology Show (MMTS) 2024 has come to a successful close, and Solidxperts is proud to have been a part of this exciting event. Held at the Palais des Congrès de Montréal from June 18-20, MMTS once again proved to be a cornerstone for the manufacturing industry, drawing thousands of professionals eager to explore the latest innovations.


            Unveiling the New Solidxperts Branding and Tradeshow BoothSolidxperts team at MMTS booth

            One of the most exciting moments for us at MMTS 2024 was the unveiling of our new Solidxperts branding and tradeshow booth. Our refreshed brand identity reflects our evolution as a company and our commitment to staying at the forefront of technology.

            The new Solidxperts tradeshow booth setupOur Impact at MMTS 2024

            Our booth was a hub of activity, attracting a diverse audience of industry leaders, engineers, and technology enthusiasts. Here’s a look at some of the highlights from the Solidxperts booth:


            Engaging Live Demonstrations

            Our live demonstrations were a standout feature of our booth. Captivating attendees with more than just our sharp-dressed team, our real-time showcases of SOLIDWORKS, 3DEXPERIENCE, and 3D printing always aim to provide valuable insight into what our tools can do, and what they can do for you!


            Showcasing the Latest 3D Innovations

            We were thrilled to introduce our latest offerings to the MMTS audience.

            Our advanced CAD and simulation tools as well as our cutting-edge 3D printing technologies truly stole the show.

            Everyone seemed particularly impressed to see how all these pieces come together to solve complex manufacturing challenges in creative and innovative ways.


            The Solidxperts tradeshow booth full of visitorsExpert Engagement

            Our team of knowledgeable experts was on-hand to engage with attendees, answer questions, and provide personalized advice.


            Valuable Networking Opportunities

            Every show, MMTS provides an excellent platform for networking, and this year was no exception. We were delighted to meet and connect with everyone, forging new relationships and strengthening existing ones.


            Next time you find yourself at an industry tradeshow, look us up and come say hi!


            Looking Ahead

            Reflecting on our participation in MMTS 2024, we are amped up and ready to empower innovation and enable design success. The positive feedback and enthusiastic response from our visitors have reaffirmed our dedication to providing top-tier solutions that meet your evolving business needs.


            Thank You!


            We extend our heartfelt thanks to everyone who visited our booth, participated in our demonstrations, and engaged with our team. Your support and interest drive us to continually push the boundaries of what’s possible in manufacturing technology.


            Stay connected with Solidxperts for more updates, insights, and upcoming events. Follow us on social media and visit our website, www.Solidxperts.com, to stay informed about our latest developments and opportunities.


            For more information about our products and services or to discuss how Solidxperts can support your business, don’t hesitate to reach out. We’re here to help, every step of the way.


            Contact us


            We look forward to participating in future events and continuing to lead the way in 3D design and manufacturing technology.

            X_green_halo

            Any questions? Need help? Ask one of our experts.

            Whether you’re ready to get started or just have a few more questions, you can contact us toll-free:
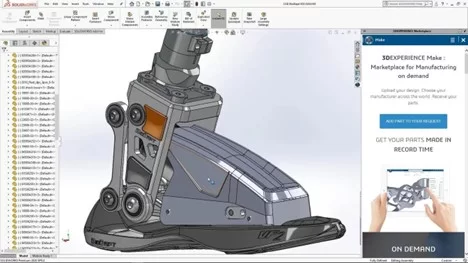
              Simplifying the Transition to 3D with 3DEXPERIENCE

              BLOG

              Simplifying the Transition to 3D with 3DEXPERIENCE

              Understanding the Shift from 2D to 3D

              The transition from traditional 2D drafting to 3D design has globally revolutionized product development. From consumer goods to F1 engines, 3D CAD offers superior design accuracy, optimizes the development process, and can simulate product performance before production even begins.

              3DEXPERIENCE platform workflows foster seamless teamwork and encourage creative innovation.


              Key Highlights

              • Enhance collaboration and streamline your development routines with a comprehensive set of CAD-aware features and tools.
              • With the 3DEXPERIENCE platform, teams can easily access and work on projects in a collaborative and interactive environment.
              • Secure cloud-based storage solutions and efficient version control ensure clean data management and protection.
              • Powerful simulation tools enhance design accuracy and optimize your product development processes.


              Why Make the Transition to 3D with 3DEXPERIENCE

              • Improved Communication: CAD models communicate greater detail and precision, reducing the likelihood of errors or confusion about design intent.
              • Enhanced Collaboration: With 3D tools, team members can collaborate in real-time, making it easier to share ideas, provide feedback, and make changes.
              • Faster Time-to-Market: Streamlining your development processes and staying agile allows you to bring higher quality products to market more quickly.


              Introduction to the 3DEXPERIENCE Platform

              The 3DEXPERIENCE platform revolutionizes product innovation with its powerful suite of intelligently connected tools and apps. It brings teams together in a unified environment for design, simulation, and delivering exceptional customer experiences. With its intuitive interface, robust simulations, and secure cloud storage, this platform makes the transition to 3D seamless, enhances collaboration, and accelerates innovation.


              Core Features

              The 3DEXPERIENCE is packed with a range of useful features:


              • Collaborative Design Environment: Work together in real-time with team members, sharing ideas and feedback.
              • Advanced Simulation Tools: Test and validate your designs with robust simulation capabilities to ensure optimal performance.
              • Secure Cloud Storage: Keep your data safe and accessible with secure, cloud-based storage solutions.
              • Mobile Accessibility: Access your projects from anywhere with full mobile compatibility, ensuring you stay productive on the go.


              How to Make the Transition to 3D with 3DEXPERIENCE


              The 3DEXPERIENCE platform simplifies the transition from 2D to 3D through its user-friendly interface and collaborative workspaces. Begin by exploring the platform’s training and tutorials to quickly familiarize yourself.

              Easily import your existing 2D data and effortlessly convert it into 3D models. Leverage intuitive design and simulation tools for seamless 3D modeling, collaborate with team members in real-time, and tap into our learning resources and training courses for support.


              Advanced 3D CAD Capabilities

              Unlock the power to create stunningly realistic product models with advanced CAD tools. SOLIDWORKS and its suite of add-ins offer cutting-edge features like parametric modeling and assembly design, allowing you to visualize your ideas with precision. Bring your concepts to life, make informed decisions, and transform your design process with unparalleled accuracy.


              Collaborative Workspace for Real-Time Collaboration

              Designed for Industry 4.0, the platform creates a dynamic digital workspace that brings your team together from anywhere. In this interactive environment, seamless communication, idea sharing, and collaboration drive innovation projects forward. Team members can work on the same project simultaneously, boosting coordination and sparking innovation. With its user-friendly interface, the platform enhances productivity, minimizes errors, and accelerates processes.


              Secure Cloud-Based Storage Solutions

              Say goodbye to physical servers and their costly upkeep! Secure cloud storage on the platform guarantees your data is safe and easily accessible to the right people at the right time.

              Team members can access and share essential data from anywhere. And, with robust security measures in place, you can focus on innovation without worrying about data breaches or loss.


              Efficient Version Control for Streamlining Projects

              The 3DEXPERIENCE platform offers powerful version control for managing design changes seamlessly. Effortlessly access, compare, and revert to previous versions, reducing errors and conflicts.


              Enhancing Design Accuracy with Powerful Simulation Tools

              The 3DEXPERIENCE platform offers designers powerful simulation tools to enhance accuracy and streamline product development. By simulating real-world scenarios early on, you can optimize designs, reduce your reliance on physical prototypes, and save time and resources. Seamlessly integrated simulation tools provide real-time feedback for informed decisions and let you design with confidence.


              Accelerating Development

              The 3DEXPERIENCE platform supercharges development by streamlining workflows. Instantly scale up with enterprise-class technologies that are always up to date with automatic updates. Collaborate online from anywhere, spark innovation, and boost productivity.


              Optimizing Workflows and Productivity

              The 3DEXPERIENCE platform boosts your productivity with intuitive tools and features. Its easy to use interface ensures a quick learning curve, allowing for swift adaptation. Real-time communication and file sharing create a strong foundation for seamless teamwork, from anywhere in the world, on any internet connected device. Plus, integration with other business applications streamlines your processes, speeding up product delivery and improving customer satisfaction.


              When to Make the Transition to 3D with 3DEXPERIENCE

              If you’re tired of hitting roadblocks with your current 2D methods, experiencing communication breakdowns, or feeling weighed down by errors and delays, now’s the perfect time to make the switch. Join the wave of industries embracing cutting-edge design technologies and ensure you’re not just keeping up, but leading the pack.


              Contact our Xperts today to get started on your 3D journey!


              How Does 3DEXPERIENCE Support Teams New to CAD Design?

              The 3DEXPERIENCE provides comprehensive support for teams new to 3D design. It offers an intuitive interface, extensive training resources, and access to a community of experts. The platform simplifies the transition from 2D to 3D design, allowing teams to quickly adapt and start realizing the benefits of 3D.


              What are the advantages of making the transition to 3D with 3DEXPERIENCE?

              Transitioning to 3D with 3DEXPERIENCE offers enhanced collaboration, streamlined design processes, real-time project tracking, and improved visualization. Businesses can innovate faster, reduce errors, and ultimately enhance productivity throughout the product development lifecycle.

              The Ultimate Guide to Working with the 3DEXPERIENCE Platform and 3DEXPERIENCE Apps

              BLOG

              The Ultimate Guide to Working with the 3DEXPERIENCE Platform and 3DEXPERIENCE Apps

              In our world of product design, efficient collaboration, and seamless lifecycle management are crucial. Thankfully, the 3DEXPERIENCE platform emerges as a powerful solution, offering a comprehensive suite of tools and applications designed to streamline the product development process. In this ultimate guide, we’ll delve into the intricacies of working with the 3DEXPERIENCE platform and explore the key features and functionalities of its associated apps.


              Understanding the 3DEXPERIENCE Platform


              At its core, the 3DEXPERIENCE platform serves as a business experience platform, providing robust product lifecycle management capabilities. This platform encourages and supports collaboration among your team members, allowing them to design products together, and guides them through the entire lifecycle from conception to final release.


              Roles and Apps


              Roles play a pivotal role in determining the apps and services accessible to you as a platform user. For mechanical designers working in collaborative teams, the Collaborative Designer for SOLIDWORKS role opens the gateway to a host of design routine-boosting functionalities.


              With this role, users can:


              • Search for, store, and manage files in collaborative spaces on the 3DEXPERIENCE platform in the cloud.
              • Share files with team members and leverage product lifecycle management features such as lock and unlock, tags, and revisions.
              • Access additional apps and services in the 3DEXPERIENCE Marketplace.


              The Collaborative Designer for SOLIDWORKS role comes with a set of apps that run within SOLIDWORKS and SOLIDWORKS Visualize, including:


              • Design with SOLIDWORKS
              • Render with SOLIDWORKS Visualize
              • Derived Format Converter (Optional)


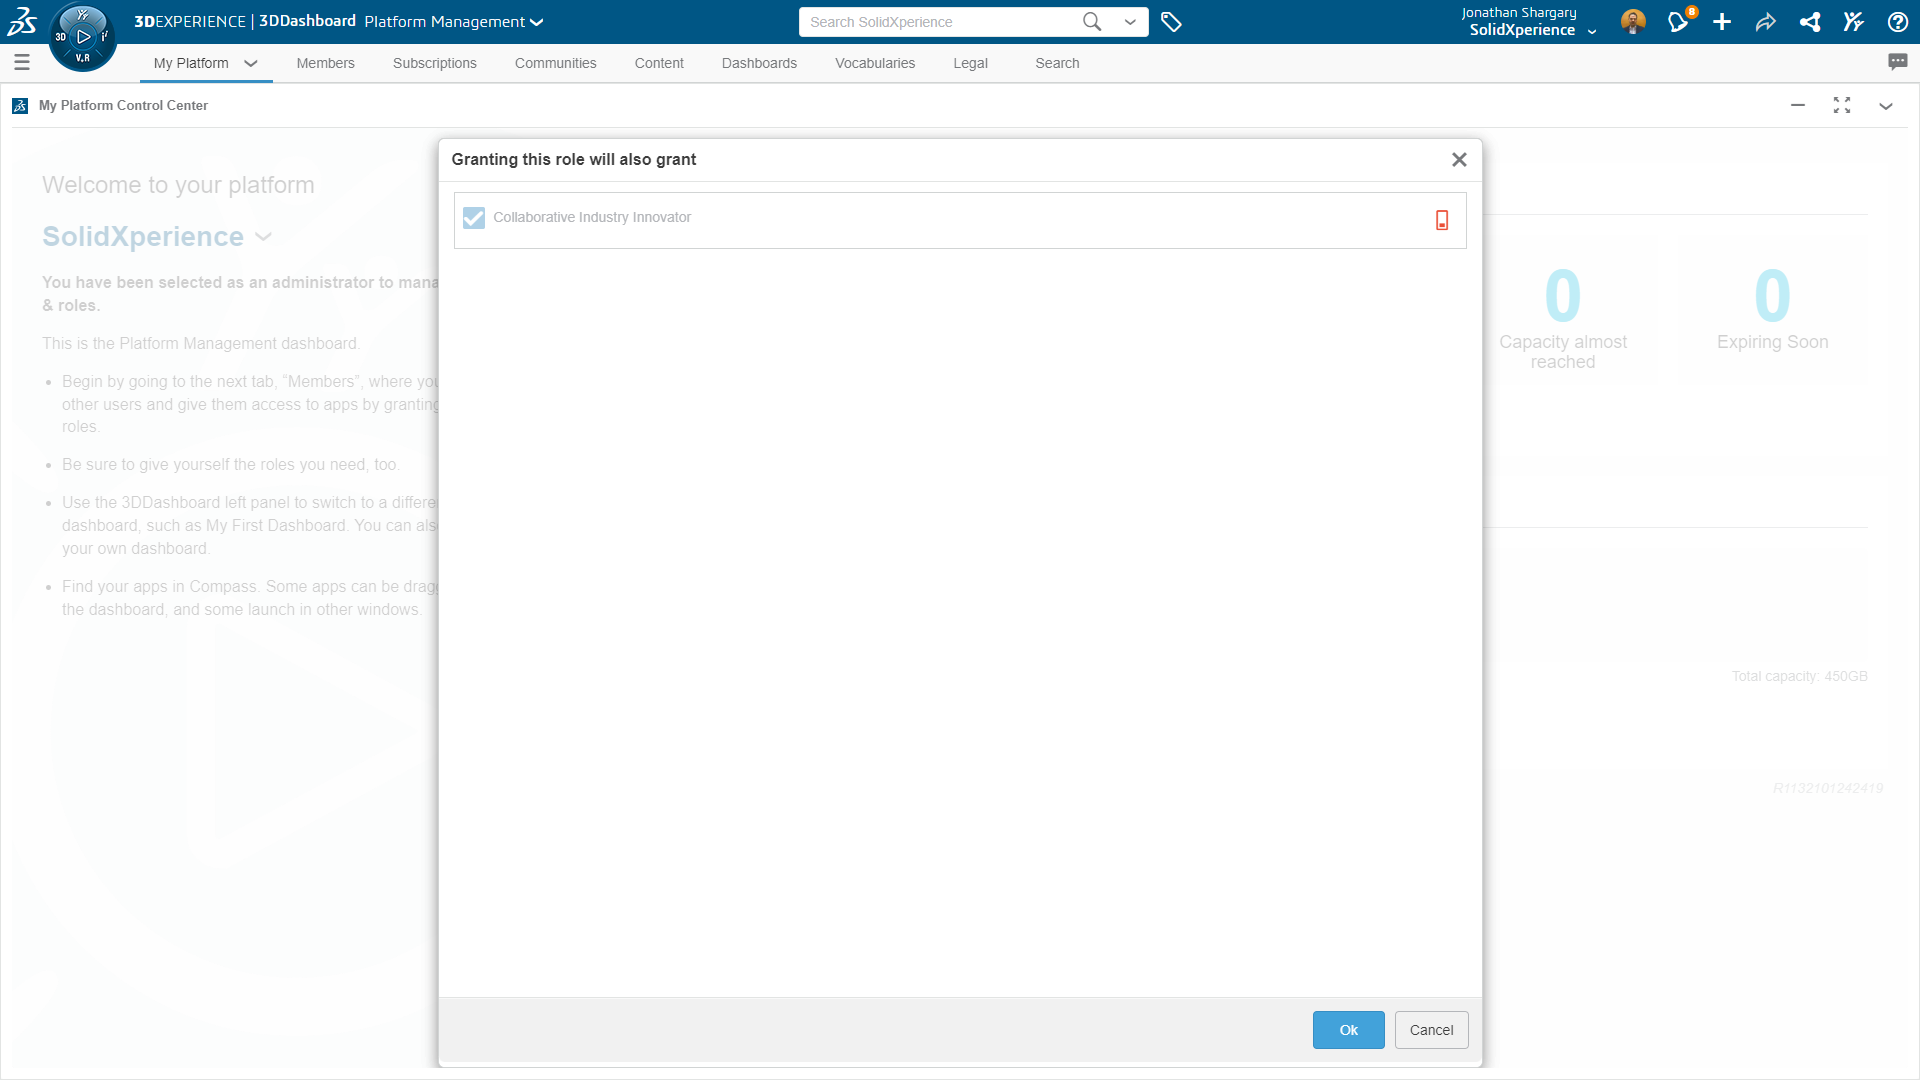
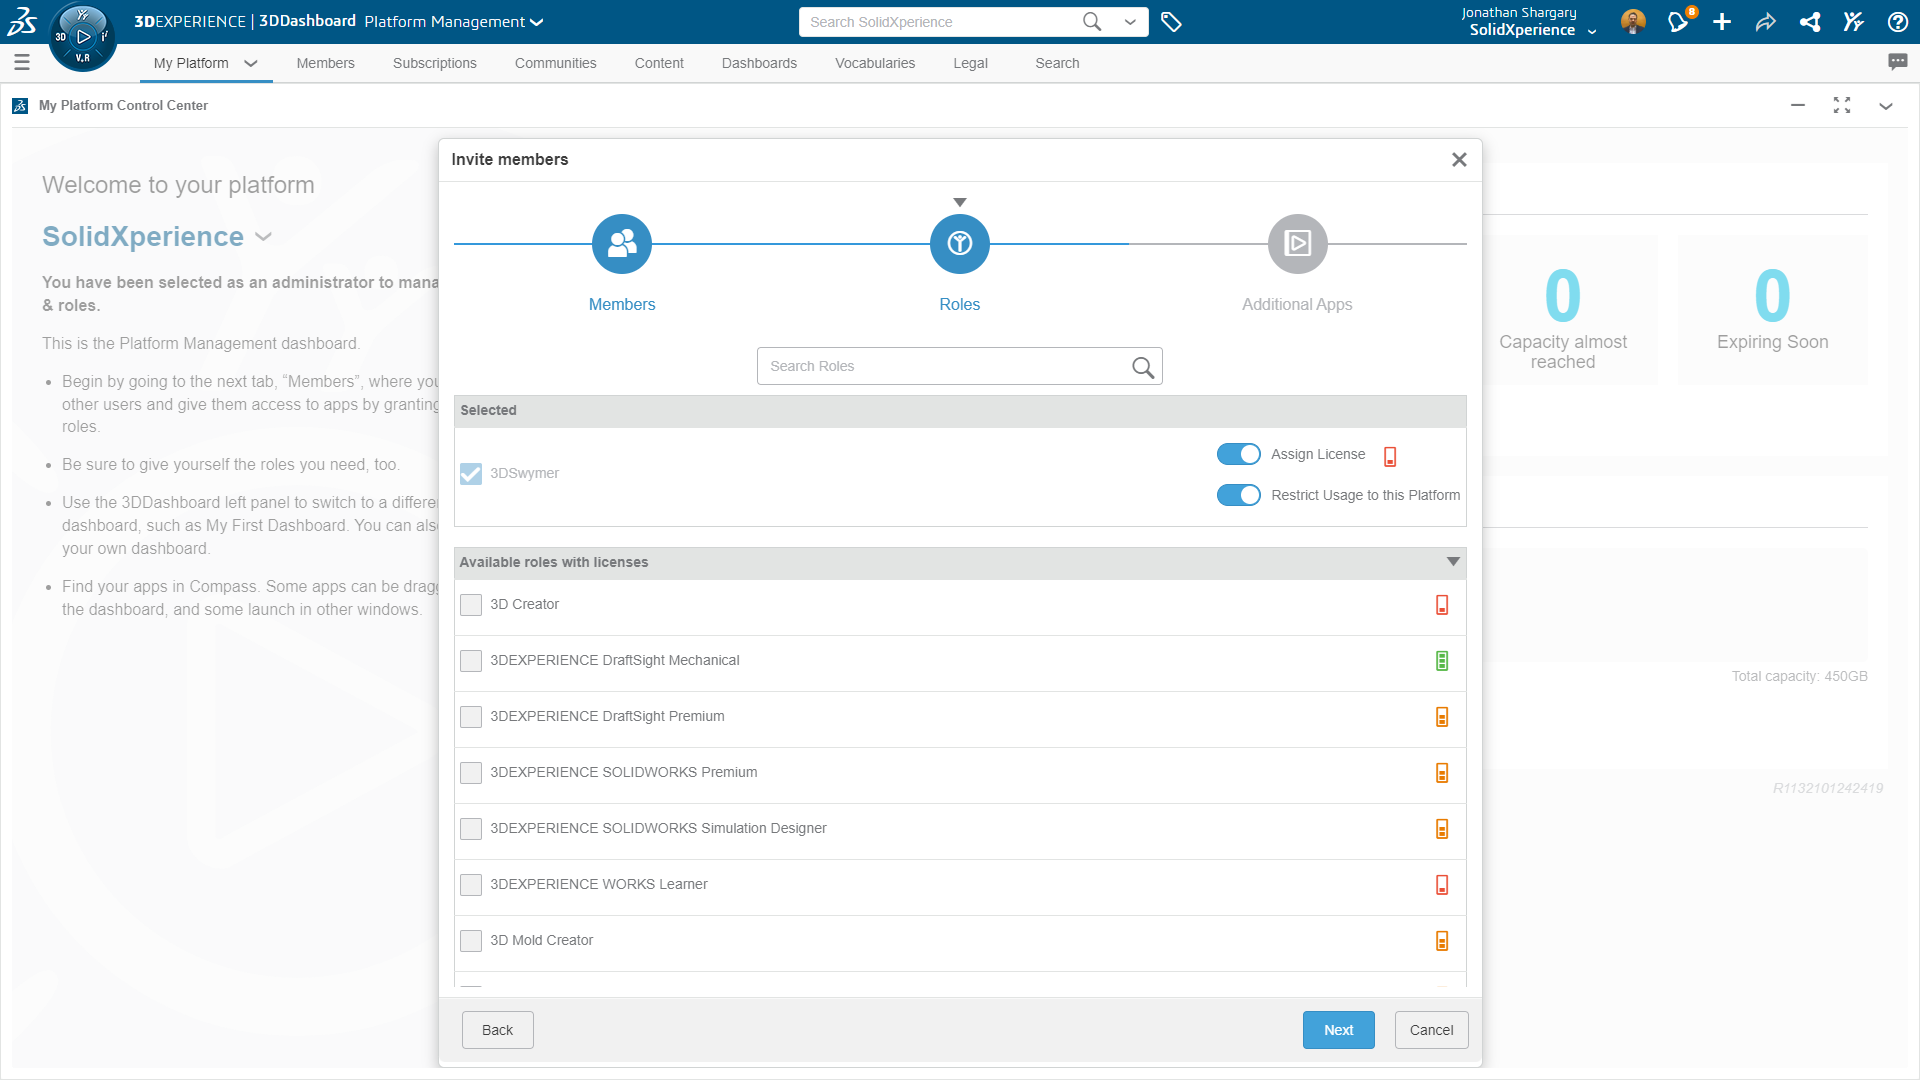
              *You’ll need both the 3DSwymer and Collaborative Industry Innovator roles before you can get started with Collaborative Designer.


              Key Terms for Navigating the Platform


              To effectively navigate the 3DEXPERIENCE platform and the 3DEXPERIENCE Connector for SOLIDWORKS, understanding key terms is essential:

              Compass – The Compass 3dexperience serves as the gateway to the 3DEXPERIENCE platform, providing access to roles and apps.


              Role – Roles define the scope of apps and services available to users, tailored to specific job requirements. Administrators can create custom roles for users.


              Collaborative Spaces – Collaborative spaces are secure areas on the platform for storing and managing files, supporting version control, and enabling collaboration among team members.


              Physical Product – A physical product is a configuration of a part or assembly that can be manufactured, each with a unique part number for efficient searching.


              CAD Family and CAD Family Objects – CAD families encompass one or more configurations of a part or assembly. CAD family objects represent the root configuration, all saved in the same collaborative space.


              Installing and Connecting


              Installing the 3DEXPERIENCE apps requires several prerequisites, including platform credentials, a web browser, Java 11 JRE, SOLIDWORKS 2019 SP0 or later, and SOLIDWORKS Visualize Standard or Professional 2020 SP3 or later. Once installed, users can seamlessly connect to the platform and access the designated apps and services.


              To install the 3DEXPERIENCE apps:


              1. Close SOLIDWORKS and SOLIDWORKS Visualize.
              2. Log in to the 3DEXPERIENCE platform.
              3. If your company has an on-premises installation, contact your Administrator to get the sign-in link.
              4. On the top bar of the 3DDashboard, click the Compass.
              5. Under Me, click SOLIDWORKS.

                      3dexperience

              6. Follow the prompts to download and install Design with SOLIDWORKS.


              Creating Collaborative Spaces


              Collaborative spaces are pivotal to the collaborative aspect of the platform. Users can create collaborative spaces to store, share, and manage files, providing a structured environment for efficient collaboration. Collaborative space owners and administrators have the authority to add members, assign access roles, and manage the collaborative space’s lifecycle.


              Getting Started with 3DEXPERIENCE Apps


              The 3DEXPERIENCE platform boasts a plethora of apps designed to cater to diverse needs. From project management to 3D model visualization, users can leverage these apps to enhance their workflow. The 3DDashboard serves as a portal, offering a centralized view of project and task information.


              Commonly Used Apps:


              3dexperience


              3DSpace: Create collaborative spaces for data storage, sharing, and controlled access.


              3dexperience


              3DSwym: Connect with communities for collaborative discussions, questions, and information sharing.


              3dexperience


              3DSearch: Find content from various sources with the ability to filter results using 6WTags.


              3dexperience


              3DPlay: A viewer for manipulating 3D models, providing advanced functionalities such as sectioning, measuring, and annotating designs.


              Managing Files in MySession


              The MySession widget plays a pivotal role in managing your SOLIDWORKS on the 3DEXPERIENCE platform. Open, save, and export files seamlessly, utilizing the context menu or action bar. The FAQ section provides valuable insights into common queries related to saving all your SOLIDWORKS files, collaborative spaces, physical products, and CAD families.


              The 3DEXPERIENCE platform, coupled with the Collaborative Designer for SOLIDWORKS role and associated apps, presents a comprehensive solution for modern product design and development. Whether you are a mechanical designer or a collaborative team member, this guide equips you with the knowledge to navigate the platform effectively, create collaborative spaces, and leverage the diverse range of apps available. Embrace the power of 3DEXPERIENCE for a seamless and collaborative product development experience.

              X_green_halo

              Any questions? Need help? Ask one of our experts.

              Whether you’re ready to get started or just have a few more questions, you can contact us toll-free:

                Reinvigorate your Engineering Passion at 3DEXPERIENCE World 2024: Take the 25th Annual Model Mania Challenge!

                BLOG

                Reinvigorate your Engineering Passion at 3DEXPERIENCE World 2024: Take the 25th Annual Model Mania Challenge!

                It’s that time of year again, 3DEXPERIENCE World 2024 is quickly approaching, and our Xperts are beyond excited! Let’s embark on a journey of collaboration and creativity at 3DEXPERIENCE World 2024, where SOLIDWORKS users and Dassault Systèmes partners converge to explore the limitless possibilities of 3D design.


                This event serves as an excellent platform for both SOLIDWORKS fans like you, and Dassault Systèmes partners like us, to come together in a shared space for networking, collaboration, and fresh inspiration. It provides a unique opportunity for everyone in our industry who shares a common passion for all things 3D to connect, exchange ideas, and build valuable professional relationships. Join us for an enriching experience February 11-14th in Dallas, TX where the whole SOLIDWORKS community can interact and explore the exciting possibilities within the realm of 3D design.


                Model Mania – Where Design Magic Happens

                Guess what’s turning 25 this year? It’s our favorite SOLIDWORKS modeling championship – Model Mania! This is the big 25th edition, and whether you’re a seasoned pro or a budding design enthusiast, you’re not going to want to miss this chance to be part of the action.


                3DExperience 2024


                In-Person Excitement Returns to 3DEXPERIENCE World

                After a few years of virtual high-fives due to the pandemic, 2023 brought back the joy of in-person interactions. And guess what? This year, 3DEXPERIENCE World is going all-in on in-person! That means you – yes, you – can dive into the excitement of Model Mania by being right there in Dallas.


                How to Participate in the Model Mania SOLIDWORKS Challenge

                At 3DEXPERIENCE World, head over to the Model Mania booth in the Playground during the conference hours on Sunday, Monday, and Tuesday. This will be your chance to showcase your SOLIDWORKS skills and compete for 1st place.


                But, what’s the challenge?

                Six cubicles, each equipped with a desk, chair, and a laptop with the necessary software, await participants. First, you’ll receive a drawing of a part, Phase 1, and you’ll need to demonstrate your SOLIDWORKS Connected skills. Following successful completion of Phase 1, you’ll get a Phase 2 drawing, reflecting edits for the part.


                The challenge, judged for accuracy and speed, promises an exciting experience for all. Winners will be announced at the Playground Theater on Wednesday, February 14th, at 12:30 PM CST, and the event will also be broadcast simultaneously on SOLIDWORKS Live!


                Explore the 3DEXPERIENCE Hands-on Trial Zone

                While at the Model Mania challenge, the Hands-on Trial Zone awaits your discovery. This interactive area is designed to give attendees an up-close and personal experience with the latest innovations in 3D design and collaboration.


                Dive into the cutting-edge features of 3DEXPERIENCE Works, including:


                • SOLIDWORKS + Cloud Services: Uncover the ease of sharing SOLIDWORKS designs through new Cloud Services included in every license. Experience the power of cloud collaboration from any location, on any device, all powered by the 3DEXPERIENCE platform.


                • Next Generation Design: Engage in a hands-on exploration of next-generation design tools on the cloud, featuring freeform subdivision (SubD) modeling and browser-based CAD. This is where design possibilities meet practical application!


                • Simulation Showcase: Immerse yourself in a glimpse of the future with cloud-enabled simulation solutions for SOLIDWORKS users. Get hands-on with the newest and most advanced tools, powered by ABAQUS, and witness the potential of simulation-driven design.


                While you’re at the 3DEXPERIENCE Hands-on Trial Zone, take advantage of the opportunity to test drive the latest technology, gain valuable insights, and engage in discussions with industry experts. It’s a collaborative space where you can explore, learn, and share your design experiences.


                Spot the Xpert

                As 3DEXPERIENCE World 2024 unfolds, keep your eyes peeled for the SolidXperience team – your go-to Xperts for all things 3D design! Whether you’re a seasoned SOLIDWORKS user, a Dassault Systèmes partner, or someone exploring the vast world of 3D innovation, we’re here to connect with you.


                Feel free to strike up a conversation with any member of the SolidXperience group. We’re not just here to showcase our expertise; we’re eager to hear about your unique 3D design journey. Whether you have burning questions, exciting success stories, or are just curious to explore the possibilities, we’re all ears!


                So, don’t be shy – Spot an Xpert, and let’s dive into the world of 3D design together.


                We can’t wait to see you in Dallas!

                X_green_halo

                Any questions? Need help? Ask one of our experts.

                Whether you’re ready to get started or just have a few more questions, you can contact us toll-free:

                  What’s New in DraftSight and 3DEXPERIENCE DraftSight 2024

                  BLOG

                  What’s New in DraftSight and 3DEXPERIENCE DraftSight 2024

                  Welcome to the future of drafting and CAD design with the latest releases of DraftSight 2024 and 3DEXPERIENCE DraftSight R2024x GA. As we embark on this journey of innovation, we’re excited to unveil the enhancements that not only elevate the capabilities of our industry-leading 2D drafting and 3D CAD solution but also redefine the user experience.


                  In this article, we’ll delve into the key features that make DraftSight 2024 and 3DEXPERIENCE DraftSight R2024x GA stand out. From collaborative tools to advanced customization options, we aim to empower you with the tools you need to boost productivity and seamlessly bring your design ideas to life. So, buckle up as we explore the cutting-edge advancements that await you in these releases.


                  1.Support for CATIA Drawings –collaborate with clarity and precision.

                  Ensuring you and your partners have the best experience when collaborating is at the top of the list. In DraftSight 2024 you can import CATIA model drawings from a local disk or the 3DEXPERIENCE platform. When you import a CATIA drawing you can expect it to behave as any other DWG file so you can easily edit the drawing.


                  DraftSight and 3DEXPERIENCE DraftSight 2024


                  Import CATIA model space drawings from a local disk or the 3DEXPERIENCE platform.


                  2. Tool Palette Customization –accelerate drawing creation and ensure consistency.

                  The tool palettes in DraftSight 2024 are designed to heighten your productivity. For starters, you can find all your frequently used commands and features in one place. Customization extends to predefined settings including layer, color, and line type, and ensures all newly created entities conform to the pre-defined standards across drawings.


                  DraftSight and 3DEXPERIENCE DraftSight 2024


                  Quickly insert an existing palette with the Import Palette functionality.


                  You can also efficiently create new palettes simply by dragging and dropping or importing and exporting pre-existing palettes created in other 2D CAD solutions.


                  3. Layer Palette – enhance the legibility of drawings with greater control of how inactive layer groups display.

                  The new Layer Manager Palette provides quick access to all your layer commands in one place, including layers, layer states, layer previews, or isolating layers. There’s also a new Merge Layer command so you can merge multiple layers into a single layer for better control and management. Last, with the new Visibility Enhancement command you can specify how objects in inactive layer groups appear in drawing areas.


                  DraftSight and 3DEXPERIENCE DraftSight 2024


                  Accessibility to the tool palette has been simplified in the new CAD General workspace.


                  4. Export Sheet Command – rapidly create new drawings from existing files without loss of detail.

                  Your wish is our command. With all the new commands in DraftSight 2024, you can stay more productive than ever, including when it comes to dealing with sheets. With the new Export Sheet command, you can export all visible entities from an active sheet viewport and entities from the sheets to the new drawing.


                  In addition, you can enhance the readability of a specific section, area, or view of the drawing with exported entities that are scaled views of model space, title block, and other annotative entities, such as dimensions and notes.


                  DraftSight and 3DEXPERIENCE DraftSight 2024


                  Export all visible entities of the active sheet viewports in model space to a new drawing with the new Export Sheet command.


                  5. Enhanced User Interface – easily navigate 3D models and reduce eyestrain.

                  To reduce eyestrain and enhance feature function visibility there’s a new default Dark mode.


                  There’s also a new View Navigator so you can easily switch between standard and isometric views or parallel and perspective views of a model. Its interface acts as a 3D orientation indicator that lets you see the current view direction.


                  DraftSight and 3DEXPERIENCE DraftSight 2024


                  The user interface features a new default dark mode to reduce eyestrain and enhance feature function visibility.


                  With DraftSight 2024 and 3DEXPERIENCE DraftSight R2024x GA, you’re not just keeping pace – you’re surging ahead. Whether you’re collaborating with precision through CATIA drawings, streamlining your workflow with customizable tool palettes, or enjoying the enhanced legibility offered by the Layer Palette, these releases are designed to make your design journey smoother and more efficient. The Export Sheet Command and the Enhanced User Interface are the cherries on top, ensuring that you not only create with precision but do so with reduced eyestrain and enhanced visual clarity.


                  As you explore the latest capabilities, we invite you to elevate your drafting experience, embrace innovation, and make the most of the tools that DraftSight 2024 and 3DEXPERIENCE DraftSight R2024x GA bring to your fingertips. If you have any questions, comments, concerns, or just want some Xpert guidance, reach out to our dedicated DraftSight teams today to learn more about how we can help bring your designs to life!

                  X_green_halo

                  Any questions? Need help? Ask one of our experts.

                  Whether you’re ready to get started or just have a few more questions, you can contact us toll-free:
                    All search results